
|
ASP.NET Core Localization and Internationalization |
ASP.NET Core (Wikipedia) is a popular cross-platform open-source web framework and the next-generation ASP.NET. ASP.NET Core contains three technologies: Razor Pages, MVC, and Web API. ASP.NET Core's online documentation contains useful topics. Read it first.
ASP.NET Core and Blazor use a new way to localize strings. They still use .resx file like every other .NET platforms, but you no longer need to create the original .resx files. All you have to do is to inject a localizer interface and then call localizer's this[string name] property for those strings that you want to localize.
The end of the document contains links to get the full source code of the samples. After reading this document, we recommend reading a tutorial about how to use Soluling.
Following instractions are for ASP.NET Core 3.0 and later including 5.0.
Add Microsoft.Extensions.Localization NuGet package. Then add the following line to the _ViewImports.cshtml.
@using Microsoft.AspNetCore.Mvc.Localization
@inject IViewLocalizer Localizer
This will automatically inject IViewLocalizer into each view or page.
View and page files typically contain a lot of strings that need to be localized. For example, the following view contains a string in the title element.
<title>Driving Time Calculator</title>
To localize the title element, use the injected an IViewLocalizer.
<title>@Localizer["Driving Time Calculator"]</title>If you did not add IViewLocalizer injection into _ViewImports.chtml you have to inject the localizer into each view or page.
@inject IViewLocalizer Localizer
For controllers, view models, and page model, you perform similar steps. First, define a local IStringsLocalizer variable.
private IStringLocalizer localizer;
Then inject an IStringLocalizer<T> into the constructor and assign that into the local variable. Make sure you inject a generic version of IStringLocalizer and pass the type of the model into the localizer type.
public IndexModel(IStringLocalizer<IndexModel> localizer)
{
  this.localizer = localizer;
}
You don't have to pass the page class, but you can pass any class. For example, if you want to have all strings in a single .resx file, always pass the same class, no matter that is the controller, page or view.
public IndexModel(IStringLocalizer<Shared> localizer)
{
  this.localizer = localizer;
}
The difference between the above two samples is that the strings are stored to IndexMode.resx, and that contains only the strings of this class. In the second sample, strings are stored into Shared.resx, and if that class use used somewhere else, the combined strings of all classes using it are stored in the Shared.resx file.
Finally, use the localizer object in your code.
public void OnGet()
{
  Message = localizer["Enter values and click Calculate."];
}
Optionally you can also add a comment on the same line following the localizer call.
str = localizer["Enter values and click Calculate."]; //loc This is a comment
If you use String.Format or string interpolation such as
str = string.Format("Sport {0}", Value.Id);
str = $"Sport {Value.Id}";
use localizer
str = localizer["Sport {0}", Value.Id]; //loc 0: Id of the sport
Note! You cannot use the string interpolation with the localizer. For example, this won't work.
str = localizer[$"Sport {Value.Id}"];
This is because the interpolated string will be evaluated before passing to the localizer resulting a different string passed each time depending on the Id value.
This is all you have to do to get the strings ready for localization. Previously with ASP.NET, you had to manually create .resx files and add each string into these files. With ASP.NET Core, you no longer have to do this.
Some of your .cs files might have strings that need to be localized. If so, you can inject IStringLocalizer into the class and use it. The traditional way to inject anything into the class is through the constructor.
using Microsoft.Extensions.Localization;

namespace Sample
{
  public class MyClass
  {
    private IStringLocalizer _localizer;

    public MyClass(IStringLocalizer<MyClass> localizer)
    {
      _localizer = localizer;
    }

    public string GetValue()
    {
      return _localizer["This is a sample"];
    }
  }
}
The type parameter you use with IStringLocalize can be whatever type you want to use. Each type you use will have its own .resx generated. So if you want to have only one .resx, always use the same type.
Another way is to use the [Inject] attribute. You don't need a constructor, and you don't have to store the injected localizer object.
using Microsoft.Extensions.Localization;

namespace Sample
{
  public class MyClass
  {
    [Inject]
    public IStringLocalizer<MyClass> Localizer { get; set; }

    public string GetValue()
    {
      return Localizer["This is a sample"];
    }
  }
}
To enable IViewLocalizer we need to configure our project. Call AddViewLocalization in ConfigureServices.
builder.Services.AddControllersWithViews()
  .AddViewLocalization();
...
If you Razor Pages then use AddMvc() instead of AddRazorPages().
To use the localized resource files, we need to configure our project for localization. First, we need to specify the location where the localized .resx file is.
var builder = WebApplication.CreateBuilder(args);
// Begin I18N configuration
builder.Services.AddLocalization(opts => { opts.ResourcesPath = "Resources"; });)
// End I18N configuration
Then we need to tell what are our supported locales and what the default locale. The following code adds English, German, and Finnish as supported cultures.
var app = builder.Build();
// Begin I18N configuration
var supportedCultures = new[] { "en", "fi" };

var options = new RequestLocalizationOptions()
  .SetDefaultCulture(supportedCultures[0])
  .AddSupportedCultures(supportedCultures)
  .AddSupportedUICultures(supportedCultures);

app.UseRequestLocalization(options);
// End I18N configuration
The above is the standard way to configure the middleware for localization. However, it hard-codes the supported languages (English, German, and Finnish) into your code. If you later add a new language, you need to modify the source code, compile, and redeploy your application. To avoid this, you could place the language codes into the configuration file and read them from the file on runtime. To make this even easier, we have implemented a class extension for IApplicationBuilder. The localization configuration takes only one line.
// Begin I18N configuration app.UseRequestLocalizationWithAvailableLanguages(Assembly.GetExecutingAssembly().Location, "en"); // End I18N configuration
The above code configures the localization but also detects the deployed satellite assembly files and uses those languages when configuring the localization. To add a new language, you only have to deploy the satellite assembly file on the server. You can get the code from GitHub and <data-dir>\Library\NET\ASP.NET.
Most models contain data annotations such as property's display names and validation errors. APS.NET Core has built-in support for data localization annotation. Except for the annotations, you don't have to add anything else to the model. However, you have to configure the middleware to use the data annotation localization. Call AddDataAnnotationsLocalization in ConfigureServices.
builder.Services.AddRazorPages()
  .AddViewLocalization()
  .AddDataAnnotationsLocalization();
You should add Display attribute to every property and enum values.
public enum SportKind
{
  [Display(Name = "Individual")]
  Individual,
  [Display(Name = "Team")]
  Team
}
ASP.NET Core uses culture providers to choose the current language. Each provider can set the language using its way. The purpose of a provider is to set Culture and UICulture of the thread handling the HTTP request. There are three built-in providers. They are:
QueryStringRequestCultureProvider provider uses a query string to pass the culture. Use culture parameter sets Culture and ui-culture parameter set UICulture. The following example sets the culture to Finnish in Finland.
https://www.soluling.com/?culture=fi-FI&ui-culture=fi-FI
If you only pass one parameter both Culture and UICulture are set the same value.
https://www.soluling.com/?culture=fi-FI
CookieRequestCultureProvider provider reads the Culture and UICulture parameters from a cookie. The default cookie name is .AspNetCore.Culture.
c=de-DE|uic=de-DE
where c is Culture and uic is UICulture.
AcceptLanguageHeaderRequestCultureProvider provider reads the culture from Accept-Language HTTP header.
By default, ASP.NET Core localization configures the three above providers such a way that first query string is used (if any), then a cookie is used (if any), and finally, Accept-Language is used. If you don't pass the query parameter and you don't have a cookie, then the default language of the browser (i.e., Accept-Language) is used. You can override the Accept-Language by settings a cookie, and you can override the cookie by passing a culture parameter. For most users, this is what you want. However, if you want to store the active culture into a database, you can write your provider and configure it in Startup.cs.
Soluling does not replace the built-in internationalization and localization method of ASP.NET Core and Blazor. Instead, Soluling extends it, making application internationalization and localization much easier. The following list shows the Soluling features that help you when localizing ASP.NET Core and Blazor applications.
ASP.NET Core and Blazor do not require the original .resx files to run the application in the original language. Still, they need localized .resx files to run the application in any other language. To create the localized .resx files, you will need the original .resx files as a template. So, the original .resx files are required. It is a time-consuming and error-prone job to create them and make sure they are up to date. Here is where Soluling provides an enormous help. Soluling reads your .csproj file to locate all your source code files (.cshtml, .cs, and .razor), finding the instances where a localizer interface or data annotation attributes has been used. When found, Soluling extracts the string passed to the localizer interface and writes the string into the right .resx file.
You no longer have to create and maintain the original .resx files, but Soluling creates them for you and always keeps them up to date. If you modify strings in the source code, you just run Soluling to update the resource files. In addition to extracting the strings and writing the original .resx files, Soluling also reads the string comments from your source code. Everything, your strings, and comments are all in place in your source code, and you never have to write any .resx.
You only have to tell Soluling where you .csproj or .sln file is located. No need to select the individual resource or source code files. If you later add new pages, views, controllers or components to your application, you don't have to change your localization settings at all.
After Soluling has created the original .resx files, it scans the .resx files extracting the strings. Use Soluling to translate the project. Finally, when building, Soluling creates localized .resx files. It can also make localized satellite assembly files.
All this can be done in your build process using Soluling's command-line tool, SoluMake.
Now when our application has been internationalized we can create a Soluling project for it. Start Soluling Drag your .csproj file into Soluling or click New from File or Files and browse the .csproj file. The project wizard appears, showing the Localizer options page.
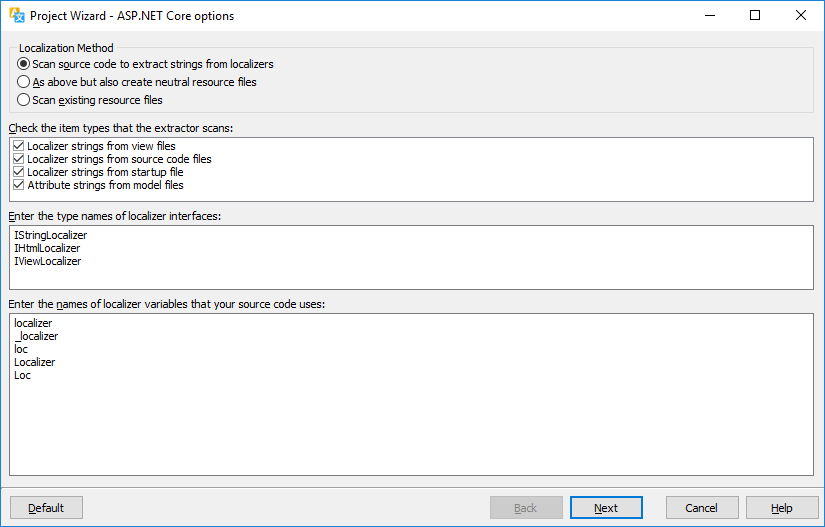
When using Soluling, you do not have to create the original resource files, but Soluling automatically scans your source code to create them. By default, the original resource file will only exist in the memory, but you can optionally also make Soluling write the files. Use the third option if you do the extraction by yourself. For most projects, the default settings work fine. To learn the meaning of each option, read the documentation.
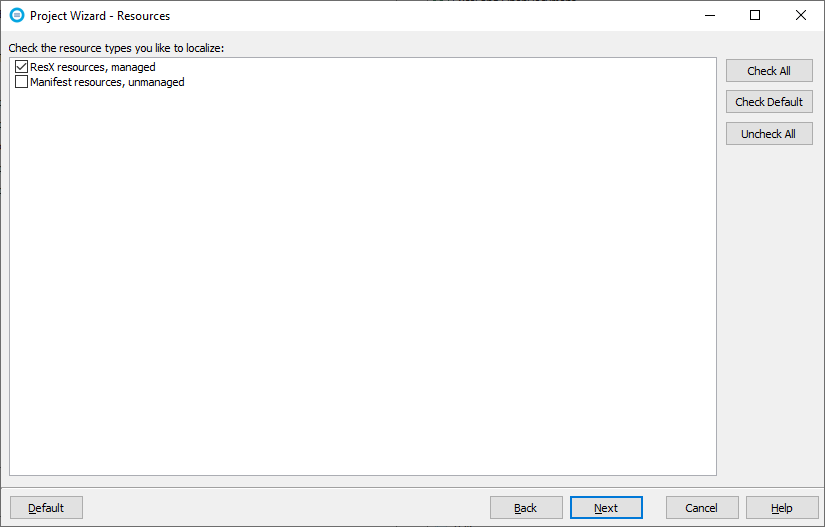
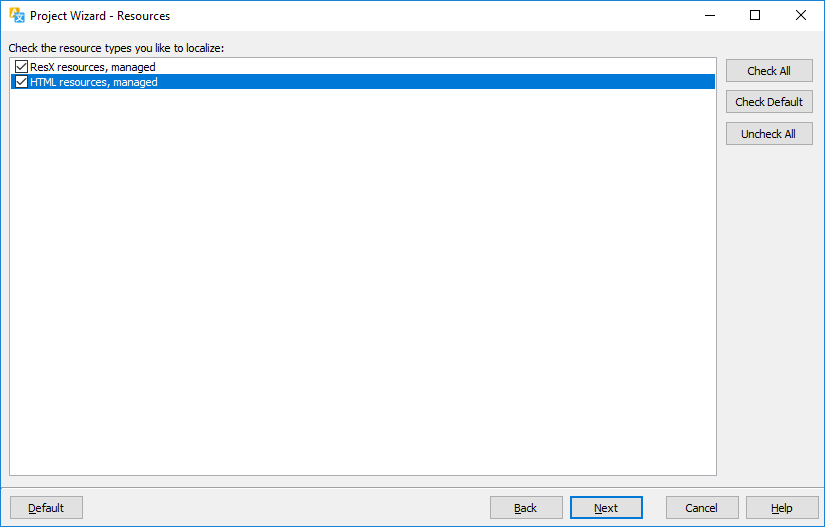
Click Next. The Resources page appears. Accept the default settings where only the .resx files are localized.
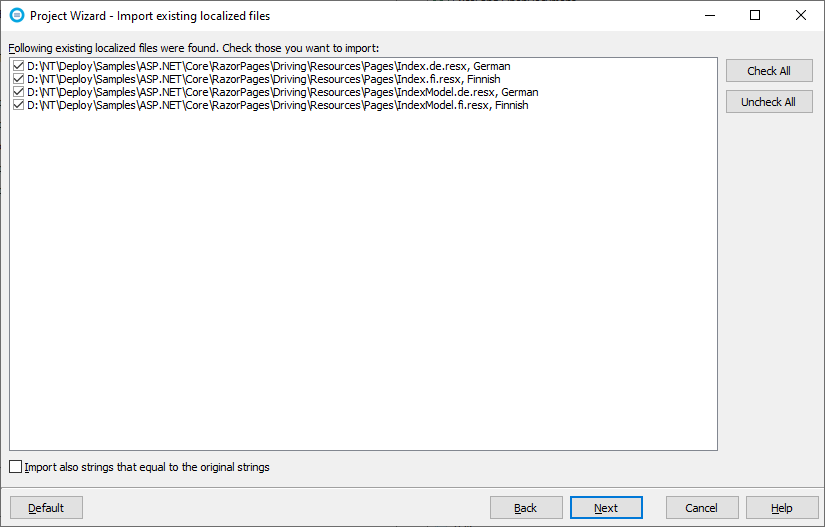
Click Next. If there are existing localized files, Solulng shows the Import existing localizer files page. You can selecet the languages that are imported.
Click Next. Select Languages page appears. Add the languages you want to support and also select the original language.
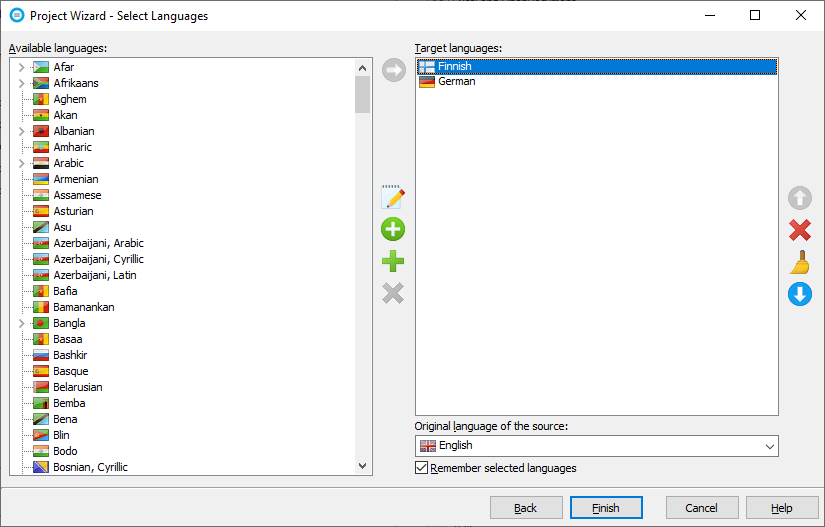
We added Finnish and German as target languages and English as the original language. Complete the wizard by clicking Finish. A new project appears.
Enter the translations or let you translator to translate the project. Learn more about how to translate a project. Once translated, you can create localized resource files.
If you use MVC, there is another option to localize view files (.cshtml). Instead of using Localizer in your views and using .resx to localize them, Soluling can make localized versions of the view files. To enable view file localization, check HTML resources in the Resources sheet.
The benefit of the view localization is that you do not have to modify your view by injecting and adding localizer. Instead, you can use hard code strings in HTML markup or script parts. To learn more about view file localization see <data-dir>\Samples\ASP.NET\Core\MVC/DrivingView sample.
Note! Razor Pages do not currently support localized page files, so using the localizer is the only option. Web API does not even use view/page files, so there is no need to localize them.
GitHub and <data-dir>\Samples\ASP.NET\Core contains sample sub directories for each ASP.NET Core programming models.
GitHub and <data-dir>\Samples\ASP.NET\Core\MVC contains following ASP.NET Core MVC samples:
| GitHub/Directory | Description |
|---|---|
| Driving | A simple driving time calculator sample that shows how to localize strings and images and how to use plural enabled message strings. |
| DrivingView | As above but each view file has a set of localized view files. |
| HelloWorld | A localized Hello World application. |
| Minimal | A minimal localized application. |
GitHub and <data-dir>\Samples\ASP.NET\Core\RazorPages contains following ASP.NET Core Razor Pages samples:
| GitHub/Directory | Description |
|---|---|
| Driving | A simple driving time calculator sample that shows how to localize strings and images and how to use plural enabled message strings. |
| Sport | A simple localized sport application that use the multilingual sport API (see below). Learn more about the application from here. |
GitHub and <data-dir>\Samples\ASP.NET\Core\WebAPI contains following ASP.NET Core Web API samples:
| GitHub/Directory | Description |
|---|---|
| SimpleAPI | A simple multilingual API that uses hard coded resources. Implements only GET method. |
| SportAPI | A multilingual API that stores sport in a database. Implements a CRUD (Wikipedia) API. Learn more about the application here. |
![]() Copyright © 2016-2026 Soluling Oy
Copyright © 2016-2026 Soluling Oy