
|
Blazor Localization and Internationalization |
Blazor (Wikipedia) is an open-source web framework. It uses similar syntax to ASP.NET Core, including the Razor syntax, but unlike ASP.NET Core, Blazor is a client-side technology. Just like JavaScript based frameworks such as Angular and React, Blazor manipulates DOM and CSS in the browser. However, Blazor uses C# instead of JavaScript.
ASP.NET Core and Blazor use a new way to localize strings. They still use .resx file like every other .NET platforms, but you no longer need to create the original .resx files. All you have to do is to inject a localizer interface and then call localizer's this[string name] property for those strings that you want to localize.
Even Blazor uses the same localizer interface concept as ASP.NET Core, Blazor only supports IStringLocalizer. IViewLocalizer, IHtmlLocalizer and data annotation localization are not supported. The following instructions are for Blazor Server .NET 8.0 and later, and for Blazor WebAssembly .NET 8.0 or later. Use Visual Studio 2019, 2022, 2026, or later.
The end of the document contains links to get the full source code of the samples. After reading this document, we recommend reading a tutorial about how to use Soluling.
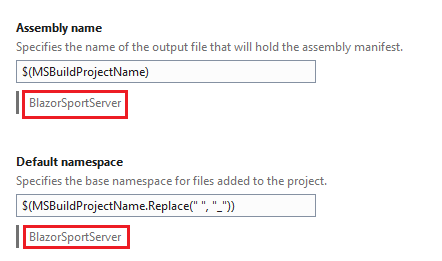
Before you start, make sure that your Assembly name and Default namespace are the same.
| New project | Older project |
|---|---|
 |
 |
If they are not the same, then Blazor cannot find the translations.
Next, add Microsoft.Extensions.Localization NuGet package. Then add the following line to the _Imports.razor.
@using Microsoft.Extensions.Localization
This makes it possible to inject IStringLocalizer without using the full type name.
Whenever you have strings that you want to localize, use IStringLocalizer. Let's have an example. We have a single p element.
<p>Loading data...</p>
To localize this, first, inject an IStringLocalizer. Pass the page class (e.g., Index in the above case) as the type parameter to injected IStringLocalizer. You don't have to pass the page class, but you can pass any class. For example, if you want to have all strings in a single .resx file, always pass the same class, no matter that is the page. Next, use the localizer for the text of the p element.
@inject IStringLocalizer<Index> localizer
...
<p>@localizer["Loading data..."]</p>
If you have a multi line string or you have sub elements with attributes use the verbatim string literals like this.
<p>First line
second line</p>
It becomes to
<p>@localizer[@"First line
second line"]</p>
If you have
<p>Click <a href="sample.html">here</a>/p>
It becomes to
<p>@localizer[@"Click <a href="sample.html">here</a>"]</p>
Start the string literal with a @ character, and you need to double every double quote inside the string.
You can use the localizer in the @code section, too. Let's have an example. We have a string.
str = "Sample";
To localize this, use the same injected localizer as for templates.
str = localizer["Sample"];
Optionally you can also add a comment on the same line following the localizer call.
str = localizer["Enter values and click Calculate."]; //loc This is a comment
If you use String.Format or string interpolation such as
str = string.Format("Sport {0}", Value.Id);
str = $"Sport {Value.Id}";
use localizer
str = localizer["Sport {0}", Value.Id]; //loc 0: Id of the sport
Note! You cannot use the string interpolation with the localizer. For example, this won't work.
str = localizer[$"Sport {Value.Id}"];
This is because the interpolated string will be evaluated before passing to the localizer resulting a different string passed each time depending on the Id value.
The internationalization impact on the template file is moderate. You have to inject the localizer and then wrap all strings with a call to the localizer. This will make your template more verbose and a bit harder to read. However, you do not have to add the string into a .resx file.
Unlike .razor files .cshtmls file do not have a page model that we could pass as a type parameter to IStringLocalizer. This is why we use an empty object, Strings, as a type parameter of IStringLocalizer.
namespace BlazorSport
{
  public class Strings
  {
  }
}
Then we can inject the localizer.
@using Microsoft.Extensions.Localization
@inject IStringLocalizer<Strings> localizer
Some of your .cs files might have strings that need to be localized. If so, you can inject IStringLocalizer into the class and use it. The traditional way to inject anything into the class is through the constructor.
using Microsoft.Extensions.Localization;

namespace Sample
{
  public class MyClass
  {
    private IStringLocalizer _localizer;

    public MyClass(IStringLocalizer<MyClass> localizer)
    {
      _localizer = localizer;
    }

    public string GetValue()
    {
      return _localizer["This is a sample"];
    }
  }
}
The type parameter you use with IStringLocalize can be whatever type you want to use. Each type you use will have its own .resx generated. So if you want to have only one .resx, always use the same type.
Another way is to use the [Inject] attribute. You don't need a constructor, and you don't have to store the injected localizer object.
using Microsoft.Extensions.Localization;

namespace Sample
{
  public class MyClass
  {
    [Inject]
    public IStringLocalizer<MyClass> Localizer { get; set; }

    public string GetValue()
    {
      return Localizer["This is a sample"];
    }
  }
}
Blazor WebAssembly and Blazor Server use an identical way to localize pages and source code. However, they differ a bit in the way how to configure the application for localization.
Use JavaScript to add getLanguage and setLanguage functions in index.html. getLanguage returns the stored language, if any. If no language has previously been stored in the local storage, the function returns the language of the browser. If the browser has no language, the function returns English. setLanguage stores the language into the local storage.
<script>
  const NAME = 'ActiveLanguage';

  function getLanguage()
  {
    let result = window.localStorage[NAME];

    return result ? result : navigator.language || navigator.userLanguage || 'en';

  }

  function setLanguage(value)
  {
    window.localStorage[NAME] = value

  }
</script>
Next, we need to configure localization in the Program.cs file. Initially, the file looks like this.
using SportWasm; using Microsoft.AspNetCore.Components.Web; using Microsoft.AspNetCore.Components.WebAssembly.Hosting; var builder = WebAssemblyHostBuilder.CreateDefault(args); builder.RootComponents.Add("#app"); builder.RootComponents.Add ("head::after"); builder.Services.AddScoped(sp => new HttpClient { BaseAddress = new Uri(builder.HostEnvironment.BaseAddress) }); await builder.Build().RunAsync();
First, set the resource directory. This is the directory where the localized .resx file will be stored.
...
builder.Services.AddSingleton(new HttpClient { BaseAddress = new Uri(builder.HostEnvironment.BaseAddress) });
builder.Services.AddLocalization(opts => { opts.ResourcesPath = "Resources"; });
...
Finally, let's call the getLanguage function to get the language and set's thread's default culture to match the language.
...
var host = builder.Build();
var jsInterop = host.Services.GetRequiredService<IJSRuntime>();
var language = await jsInterop.InvokeAsync<string>("getLanguage");

var culture = new CultureInfo(language);
CultureInfo.DefaultThreadCurrentCulture = culture;
CultureInfo.DefaultThreadCurrentUICulture = culture;

await host.RunAsync();
Now your application has been configured to consume localized resources, and it is ready for localization.
To use the localized resource files, we need to configure our project for localization. First, we need to specify the location where the localized .resx file is. Add the following line to Program.cs.
builder.Services.AddRazorPages();
builder.Services.AddServerSideBlazor();
// Begin I18N configuration
builder.Services.AddLocalization(opts => { opts.ResourcesPath = "Resources"; });
// End I18N configuration
Then we need to tell what are our supported locales and what the default locale. The following code adds English, German, and Finnish as supported cultures.
app.UseRouting();
// Begin I18N configuration
var supportedCultures = new[] { "en", "de", "fi" };

var localizationOptions = new RequestLocalizationOptions()
  .SetDefaultCulture(supportedCultures[0])
  .AddSupportedCultures(supportedCultures)
  .AddSupportedUICultures(supportedCultures);

app.UseRequestLocalization(localizationOptions);
// End I18N configuration
The above is the standard way to configure the middleware for localization. However, it hard-codes the supported languages (English, German, and Finnish) into your code. If you later add a new language, you need to modify the source code, compile, and redeploy your application. To avoid this, you could place the language codes into the configuration file and read them from the file on runtime. To make this even easier, we have implemented a class extension for IApplicationBuilder. The localization configuration takes only one line.
// Begin I18N configuration app.UseRequestLocalizationWithAvailableLanguages(Assembly.GetExecutingAssembly().Location, "en"); // End I18N configuration
The above code configures the localization but also detects the deployed satellite assembly files and uses those languages when configuring the localization. To add a new language, you only have to deploy the satellite assembly file on the server. You can get the code from GitHub and <data-dir>\Library\NET\ASP.NET.
Blazor Server does not have code to get the active language (e.g. the language of the browser). To do that, we need to use JavaScript. First, add a JavaScript file.
function getLanguage()
{
  return navigator.language || navigator.userLanguage || 'en';
}
Make sure that the server-side prerendering is disabled. Modify Html.RenderComponent in _Host.cshtml.
<body>
  <app>
    <!-- Lets disable prerendering so JS interop call inside OnInitializedAsync will work -->
    @(await Html.RenderComponentAsync<App>(RenderMode.Server))
  </app>
  <script src="_framework/blazor.server.js"></script>
</body>
Finally, call getLanguage from Page's OnInitializedAsync and use the returned value. For example
protected override async Task OnInitializedAsync()
{
  var browserLanguage = await jsRuntime.InvokeAsync<string>("getLanguage");
  Sports = await SportService.GetAllAsync(browserLanguage);
}
Soluling does not replace the built-in internationalization and localization method of ASP.NET Core and Blazor. Instead, Soluling extends it, making application internationalization and localization much easier. The following list shows the Soluling features that help you when localizing ASP.NET Core and Blazor applications.
ASP.NET Core and Blazor do not require the original .resx files to run the application in the original language. Still, they need localized .resx files to run the application in any other language. To create the localized .resx files, you will need the original .resx files as a template. So, the original .resx files are required. It is a time-consuming and error-prone job to create them and make sure they are up to date. Here is where Soluling provides an enormous help. Soluling reads your .csproj file to locate all your source code files (.cshtml, .cs, and .razor), finding the instances where a localizer interface or data annotation attributes has been used. When found, Soluling extracts the string passed to the localizer interface and writes the string into the right .resx file.
You no longer have to create and maintain the original .resx files, but Soluling creates them for you and always keeps them up to date. If you modify strings in the source code, you just run Soluling to update the resource files. In addition to extracting the strings and writing the original .resx files, Soluling also reads the string comments from your source code. Everything, your strings, and comments are all in place in your source code, and you never have to write any .resx.
You only have to tell Soluling where you .csproj or .sln file is located. No need to select the individual resource or source code files. If you later add new pages, views, controllers or components to your application, you don't have to change your localization settings at all.
After Soluling has created the original .resx files, it scans the .resx files extracting the strings. Use Soluling to translate the project. Finally, when building, Soluling creates localized .resx files. It can also make localized satellite assembly files.
All this can be done in your build process using Soluling's command-line tool, SoluMake.
Now it is time to create a Soluling project for our internationalized application. Start Soluling. Drag and drop your .csproj file into Soluling or click New from File or Files and browse the .csproj file. The project wizard appears, showing the Localizer options page.
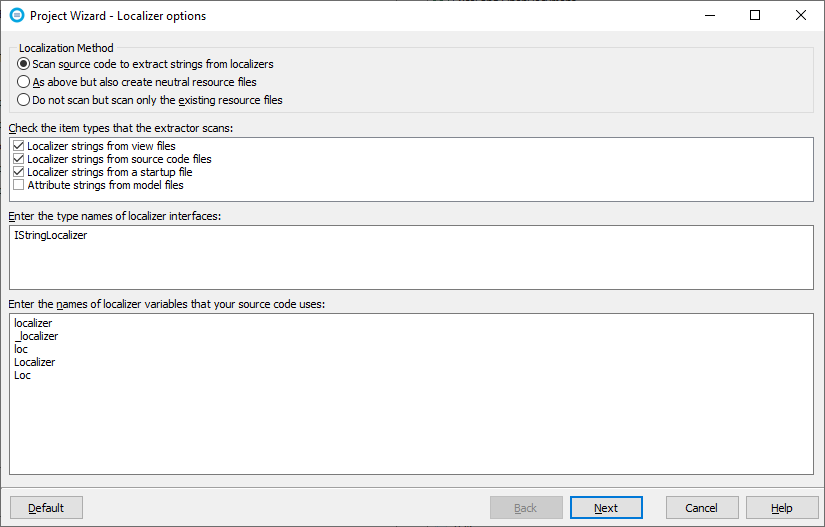
When using Soluling, you do not have to create the original resource files, but Soluling automatically scans your source code to create them. By default, the original resource file will only exist in the memory, but you can optionally also make Soluling write the files. Use the third option if you do the extraction by yourself. For most projects, the default settings work fine. To learn the meaning of each option, read the documentation.
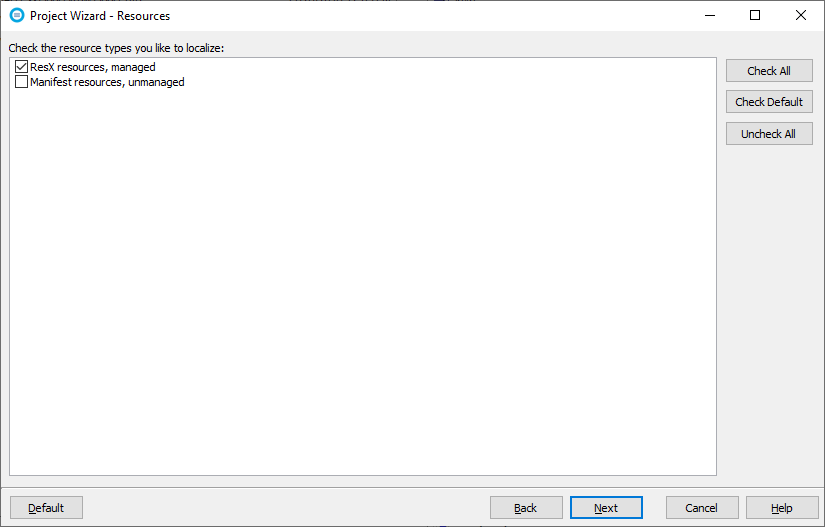
Click Next. The Resources page appears. Accept the default settings where only the .resx files are localized.
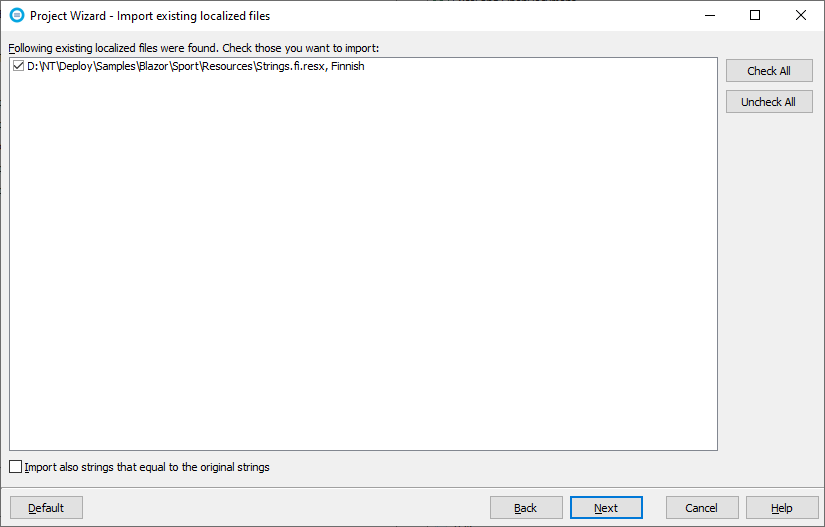
Click Next. If there are existing localized files, Solulng shows the Import existing localizer files page. You can selecet the languages that are imported.
Click Next. Select Languages page appears. Add the languages you want to support and also select the original language.
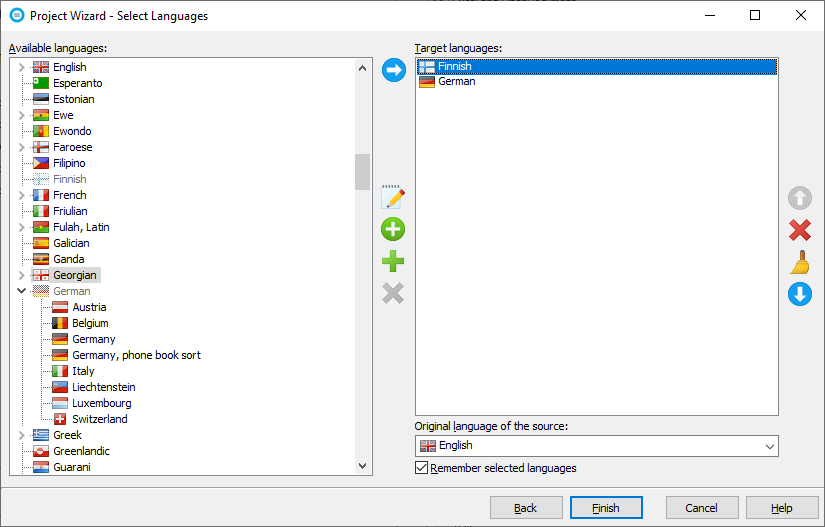
We added Finnish and German as target languages and English as the original language. You can later add new target languages. Complete the wizard by clicking Finish. A new project appears.
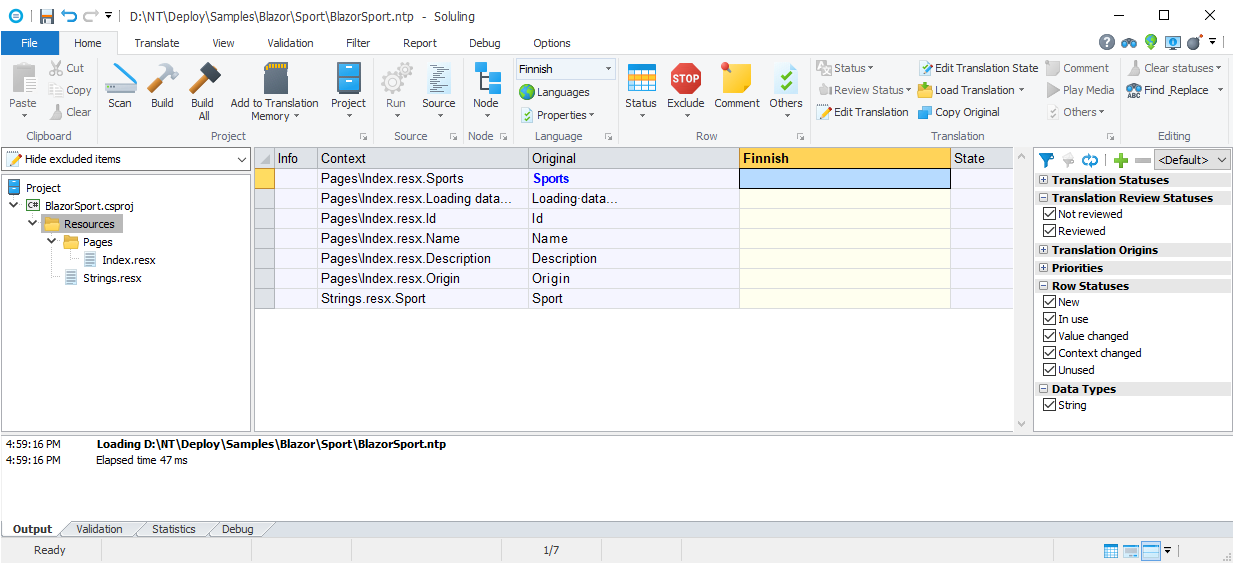
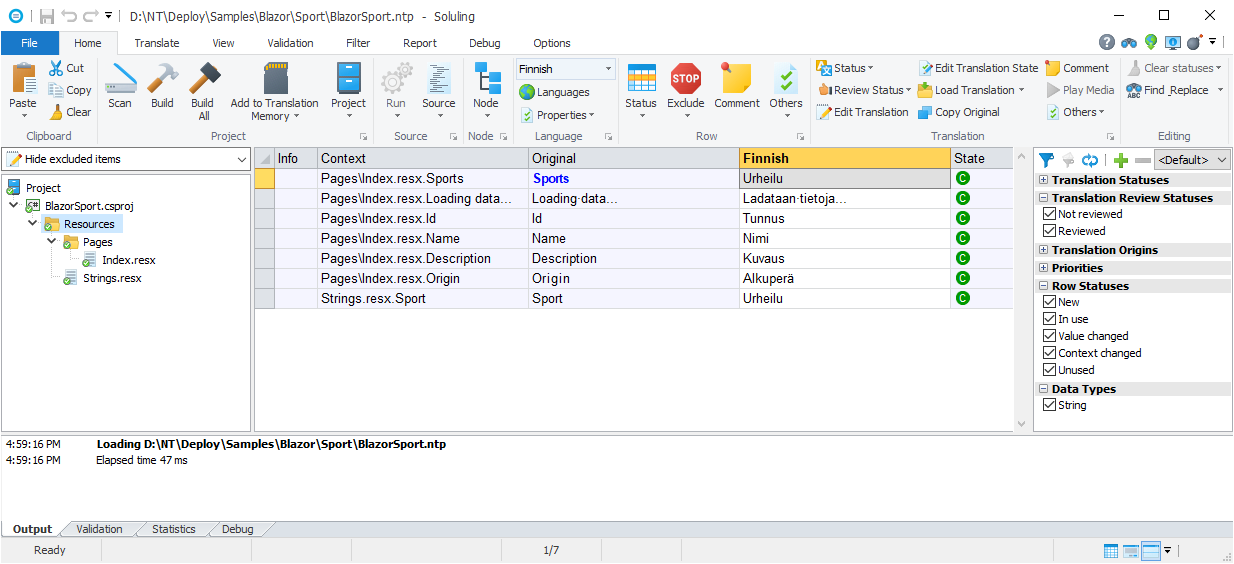
As you can see, Soluling created two temporal .resx files: Pages\Index.resx and Strings.resx. There will be one .resx file each type passed to IStringLocalizer. Next, translate the strings.
Finally, click Build All to build the localized resource files in the Resources directory and to the localized satellite assemblies. If you open your project to Visual Studio, you can see the localized .resx files in the Resources folder.
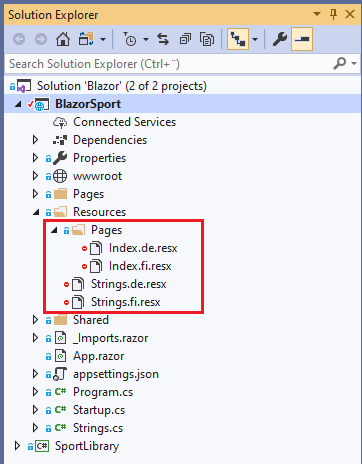
Next time you compile your Blazor project, Visual Studio will create the main assembly and the German and Finnish satellite assemblies. Deploy the satellite assemblies with the main assembly.
The process to localize Razor class libraries is the same. However, because the class libraries do not have a Program.cs or Startup.cs file, they use the application's middleware. This means that the resource directory name is the same as in the application. Only the directory name is the same. The class library has its project-specific resource directory. Unlike with the application, Soluling cannot read the resource dictionary's value from the source code files of the project (because it is not there). You have to tell it when you create a project. Set the value in the Localizer Options sheet of the Project Wizard.
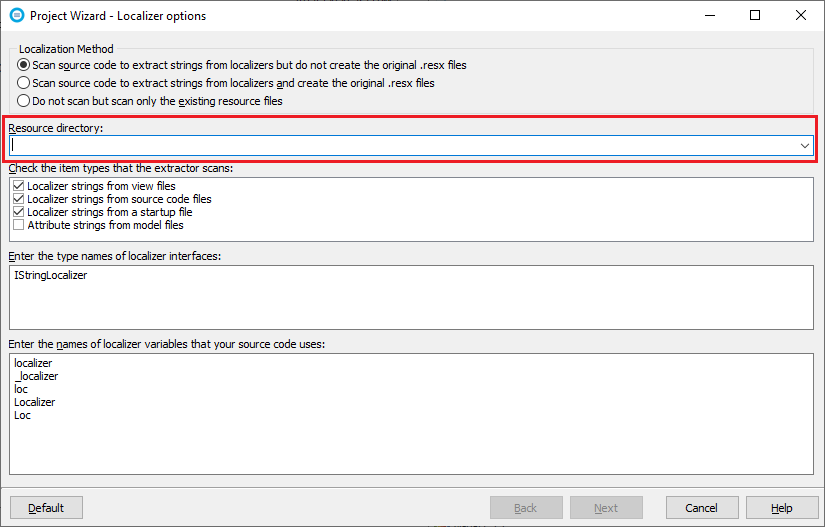
You can type the directory name or select from the drop-down list. Suppose your Soluling project already contains the Razor application source. In that case, Soluling automatically uses the resource directory value of the application with every class library you add to the same Soluling project.
GitHub and <data-dir>\Samples\Blazor contains following Blazor samples:
| GitHub/Directory | Description | Notes |
|---|---|---|
| Server/SimpleServer | A simple localized Blazor Server application. | Try this first! |
| Server/Multi | A localized Blazor Server application that shows how to localize a Razor class library. | |
| Server/Shared | The same as above but all pages, components and classes use the same shared resource file. | |
| Server/SportServer | A localized Blazor Server application that uses the multilingual sport API. | Learn more about the application from here. |
| Wasm/SportWasm | A localized Blazor WebAssembly application that use the multilingual sport API. | Learn more about the application from here. |
![]() Copyright © 2016-2026 Soluling Oy
Copyright © 2016-2026 Soluling Oy