
|
Go Localization and Internationalization |
Go (Wikipedia) is a popular programming language. Soluling Desktop and Soluling Cloud support the message files of go-i18n, the most common localization package for Go.
The end of the document contains links to get the full source code of the samples. After reading this document, we recommend reading a tutorial about how to use Soluling.
Use the go-i18n (homepage) package to internationalize your code. Start by adding go-i18n to your module and installing its goi18n command-line tool.
go get github.com/nicksnyder/go-i18n/v2
go install github.com/nicksnyder/go-i18n/v2/goi18n@latest
Import go-i18n and the language package into your code.
import (
  "encoding/json"
  "fmt"

  "github.com/nicksnyder/go-i18n/v2/i18n"
  "golang.org/x/text/language"
)
Create a localization bundle.
bundle := i18n.NewBundle(language.English)
Load translations into your bundle.
bundle.RegisterUnmarshalFunc("json", json.Unmarshal)
// Add your language(s) here. This loads English, German, and Finnish.
bundle.MustLoadMessageFile("active.en.json")
bundle.MustLoadMessageFile("active.de.json")
bundle.MustLoadMessageFile("active.fi.json")
Set the active language.
localizer := i18n.NewLocalizer(bundle, "fi") // Select Finnish
Use the localizer to translate strings. For example, if you have
fmt.Println("Hello World")
change the above line to
fmt.Println(
  localizer.MustLocalize(&i18n.LocalizeConfig{
    DefaultMessage: &i18n.Message{
      ID: "HelloWorld",
      Other: "Hello World"},
  }))
The syntax that go-i18n uses is a bit verbose, but it is also very flexible.
You can use placeholders. Pass their values in TemplateData.
fmt.Println(
  localizer.MustLocalize(&i18n.LocalizeConfig{
    DefaultMessage: &i18n.Message{
      ID: "HelloName",
      Other: "Hello {{.name}}!",
    },
    TemplateData: map[string]interface{}{
      "name": "John",
    },
  }))
You can use plural enabled messages. Give the forms of your original language and pass the count in PluralCount.
fmt.Println(
  localizer.MustLocalize(&i18n.LocalizeConfig{
    DefaultMessage: &i18n.Message{
      ID: "Skis",
      One: "I have {{.ski}} ski.",
      Other: "I have {{.ski}} skis.",
    },
    TemplateData: map[string]interface{}{
      "ski": 2,
    },
    PluralCount: 2,
  }))
Once you have internationalized your code, run the extractor tool. go-i18n supports three resource file formats: JSON, YAML, and TOML. Soluling supports JSON, so use the -format json option.
goi18n extract -format json
The extractor creates a resource file called active.en.json. It contains the default messages of your code.
{
  "HelloName": "Hello {{.name}}!",
  "HelloWorld": "Hello World",
  "Skis": {
    "one": "I have {{.ski}} ski.",
    "other": "I have {{.ski}} skis."
  }
}
This file is the original file that you localize. You don't need go-i18n's own translation workflow (goi18n merge and the translate.*.json files), because Soluling creates the localized active.*.json files directly. Soluling also writes the right plural forms for each language, for example, one, few, many, and other for Polish. Run the extractor again whenever you have modified the strings in your code.
 Desktop process
Now it is time to create a Soluling project for our resource file. Start Soluling. Drag and drop the active.en.json file into Soluling or click New from File or Files and browse the active.en.json file. The project wizard shows the Select File Type dialog.
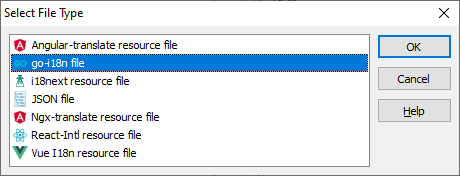
Select Go I18N file and click OK. The Select Languages page appears. Add the languages you want to support and also select the original language.
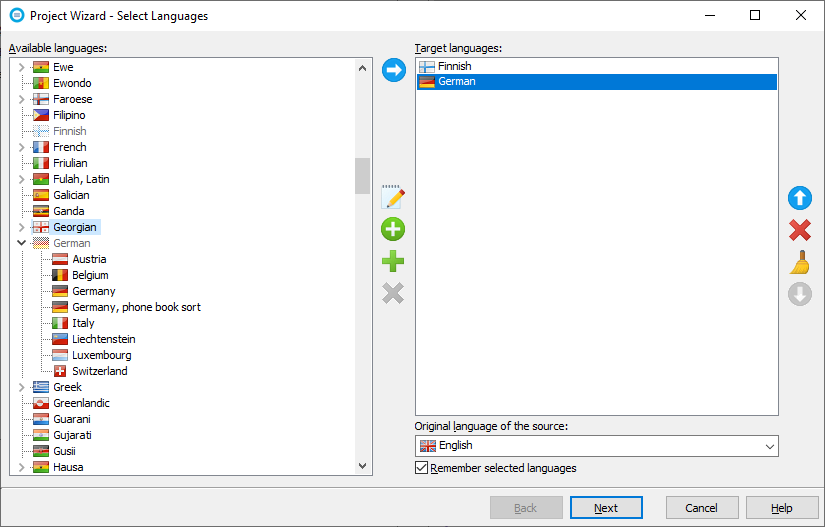
We added Finnish and German as target languages and English as the original language. Complete the wizard by clicking Finish. A new project appears.
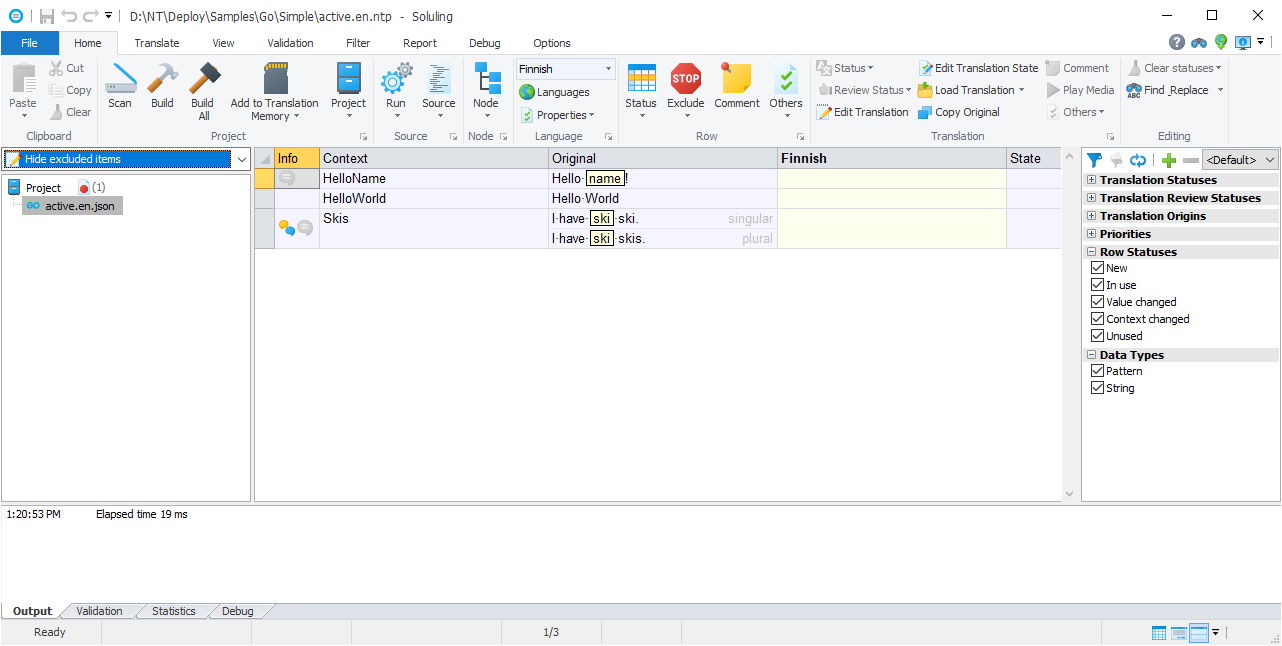
Next, translate the strings.
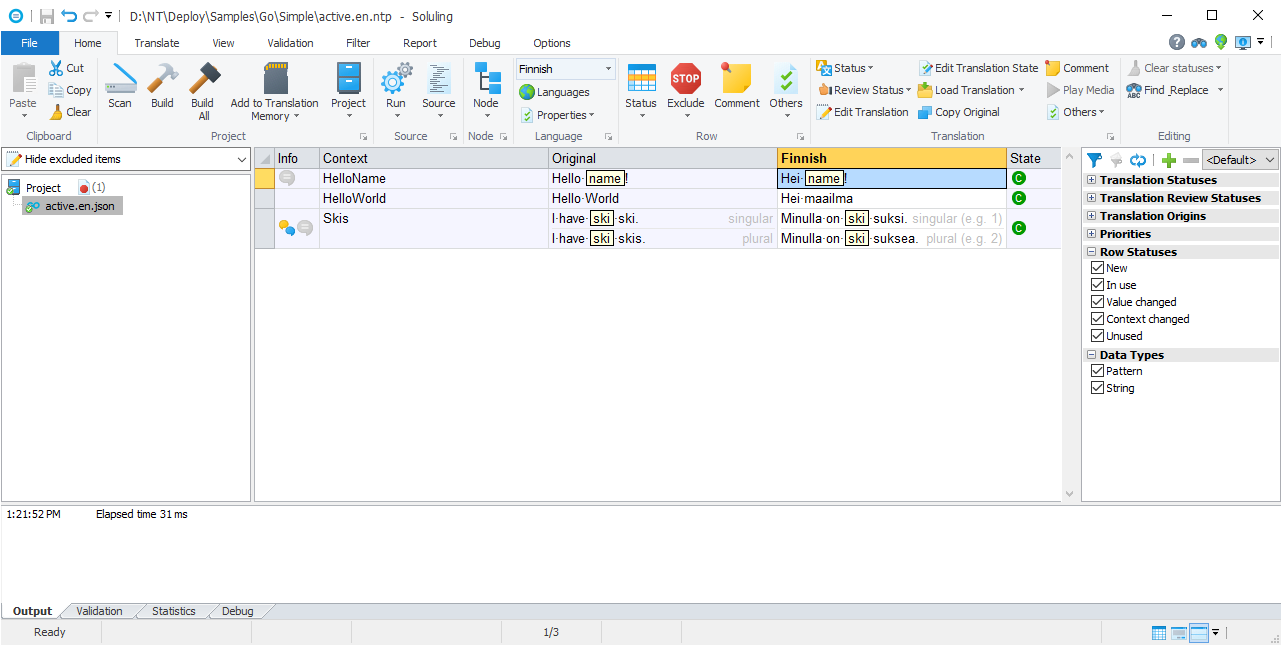
Finally, choose Home | Build All to build the localized resource files (active.de.json and active.fi.json) in the same directory as the original active.en.json.
When you change the strings, run the extractor again, open the Soluling project, and choose Home | Scan. Soluling keeps the existing translations, and you only translate the strings that were added or changed.
 Cloud process
With Soluling Cloud, you localize the resource file in your browser: upload the file, translate it in Translate, and download the localized files. You need a Soluling account. See the available Cloud plans.
active.en.json, or drag and drop the file onto the page. Click Create.Click the project's green Translate button on the dashboard. Translate opens the project, and you can type the translations into the grid. Machine translation suggestions, translation memory, and spell checking are available there. You do not have to finish every language before moving on to the next step.
Plural messages are shown with a row for each plural form of the target language.
active.en.json with a download button for each target language. Save the localized files next to active.en.json, named with the language code, for example, active.fi.json for Finnish.When you have run the extractor again, upload the new active.en.json, translate what is new or changed, and download the localized files again. On the dashboard, click the project's Update file button (the upload arrow), select the new file or drop it onto the page, and click Update. Existing translations are kept, so you only translate the strings that were added or changed.
The dashboard is one of four ways to use Soluling Cloud. You can also use the SoluCLI command-line tool, Soluling Desktop, or SoluMake, which can run the update and build steps in your build pipeline. See the Cloud tutorial for all of them.
GitHub and <data-dir>\Samples\Go contain the following Go samples:
| Directory | Description |
|---|---|
| Simple | A simple sample (hello.go) that uses the go-i18n package and shows how to localize plain, placeholder, and plural messages. Contains the original active.en.json, the localized German, Finnish, and Japanese files, and test.en.json that also contains a message with two placeholders. |
You create a resource file localization project by adding a Go resource file (e.g., D:\Sample\active.en.json) into your Soluling project. You can configure how to localize your Go resource file
by selecting the item in the project tree, right-clicking, and choosing the Options menu. A source dialog appears that lets you edit the options. This source uses the following option sheets.
 Copyright © 2016-2026 Soluling Oy