
|
Word Localization and Internationalization |
Microsoft Word (Wikipedia) is a popular word processor. Soluling Desktop and Soluling Cloud can translate Word documents. Soluling reads the original document, lets you translate its text, and creates a localized document for each language. The localized documents have the same structure, layout, and formatting as the original.
The end of the document contains links to get the full source code of the samples. After reading this document, we recommend reading a tutorial about how to use Soluling.
Soluling localizes Word documents in the Office Open XML format (.docx) that Word 2007 and later use. If you have a document in the old binary format (.doc), open it in Word and save it as .docx first.
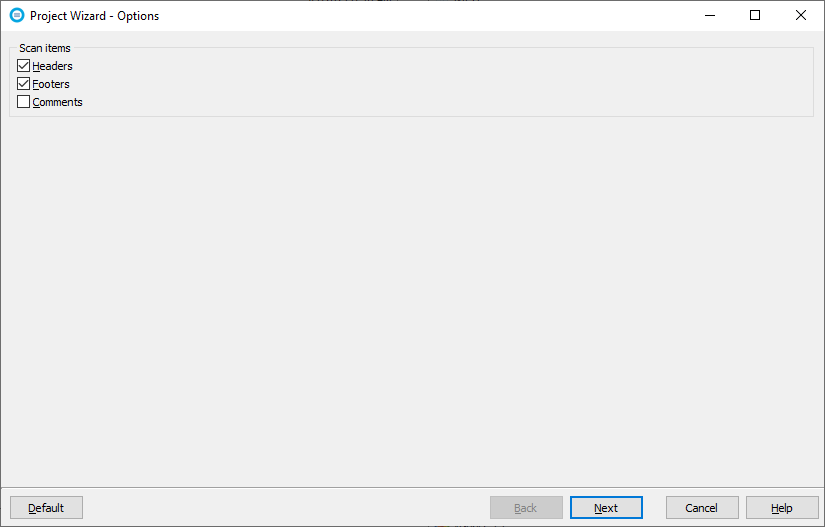
Soluling always scans the body text of the document, including the text in tables. Formatted text, such as a sentence that contains a bold or italic word, is kept as one string so that the translator can translate the whole sentence. In addition, you can choose to scan:
| Item | Description |
|---|---|
| Headers | The text of the page headers. |
| Footers | The text of the page footers. |
| Comments | The comments of the document. |
| Hyperlinks | The addresses of the hyperlinks, for example, if the localized documents should link to localized web pages. |
Select these items on the Options sheet. If a document contains images that contain text or are otherwise culture-specific, you can also localize the images. See the Sport sample.
Keep in mind that translations are often longer than the original text. After building, open the localized documents and check the layout, especially tables, text boxes, and page breaks.
You can localize a document either in Soluling Desktop or in Soluling Cloud.
 Desktop process
Start by creating a new project for your Word document, for example, Sport.docx. The Project Wizard first shows the Options sheet where you can select what items are localized in addition to the body text.
Click Next to get to the Languages sheet where you can select the original language and add the target languages. You can later add any number of languages to the project.
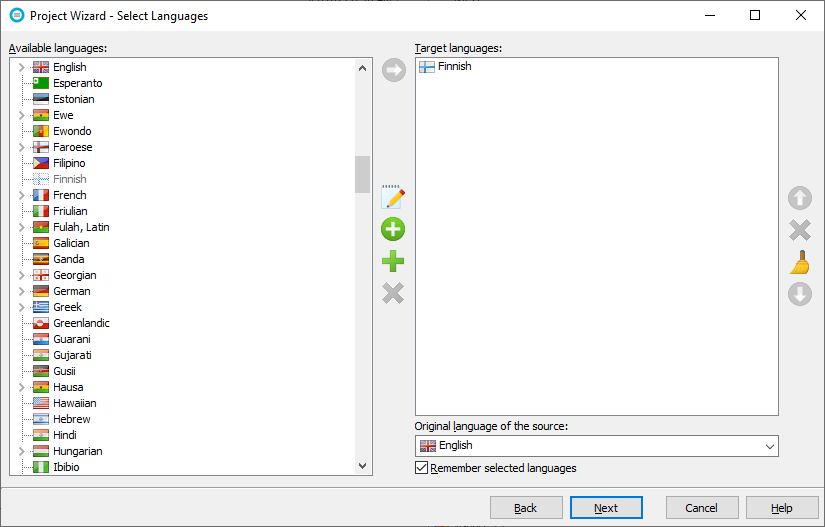
Select English as the original language and add one or more target languages. In our sample, we chose Finnish. Click Finish to complete the wizard. Soluling creates a project for the Word file, scans the file, and shows the strings in the editor.
Next, translate the strings. Finally, choose Home | Build All to build the localized documents. By default, Soluling creates them in language-specific subdirectories, for example, fi\Sport.docx.
When you change the original document, open the Soluling project and choose Home | Scan. Soluling keeps the existing translations, and you only translate the text that was added or changed.
 Cloud process
With Soluling Cloud, you translate the document in your browser: upload the file, translate it in Translate, and download the localized documents. You need a Soluling account. See the available Cloud plans.
Sport.docx), or drag and drop the file onto the page. Click Create.Click the project's green Translate button on the dashboard. Translate opens the project, and you can type the translations into the grid. Machine translation suggestions, translation memory, and spell checking are available there. You do not have to finish every language before moving on to the next step.
Formatting inside a string, such as bold text and links, is shown as protected tags.
When you change the original document, upload it again, translate what is new or changed, and download the localized documents again. On the dashboard, click the project's Update file button (the upload arrow), select the new document or drop it onto the page, and click Update. Existing translations are kept, so you only translate the text that was added or changed.
If you want to scan headers, footers, comments, or hyperlinks, or localize images, create the project in Soluling Desktop, where you can set these options, and upload it to Soluling Cloud. See the Cloud tutorial.
GitHub and <data-dir>\Samples\Word contain the following Word samples:
| File | Description | Notes |
|---|---|---|
| Simple.docx | A simple document that contains a heading and two paragraphs, one of them with formatted text. | Study this first. |
| Full.docx | A document that contains a header, a footer, paragraphs, and a table. | |
| Sport\Sport.docx | A document that contains information about some sports. Also shows how to localize images. |
The localized Finnish documents are in the fi subdirectories (fi and Sport\fi).
You can configure how to localize your Word file by selecting the item in the project tree, right-clicking, and choosing the Options menu. A source dialog appears that lets you edit the options. This source uses the following option sheets.
Read more about other document files such as DITA, Help+Manual, HTML, HTML Help, LaTeX, Word, PowerPoint, Markdown, RTF, and PDF files.
 Copyright © 2016-2026 Soluling Oy